Inhaltsverzeichnis
3 Working with items and revisions
3.1 Fundamentals
In Teamcenter parts are called “items” or “item revisions”. The item is a kind of “bracket” that summarizes the revisions. An item always has at least one revision. The item number (item ID) is assigned when the item is created and then inherited by all revisions, i.e. the item ID of all revisions is always the same. Normally, an item ID cannot be changed in the normal way.
The item also contains properties (attributes) that must be the same for all revisions, such as the unit of measurement. This must never change at any part again - especially if SAP is used - and must also not be different for the revisions.
The name of the revisions can change, normally the item gets the name of the first revision. For FFG it was introduced via the naming catalog that the item name is identical to that of the last revision. However, the item name has no technical meaning.
3.2 Creating a part in Teamcenter
In Teamcenter, you can create a part as follows:
Select “File → New → Item”.
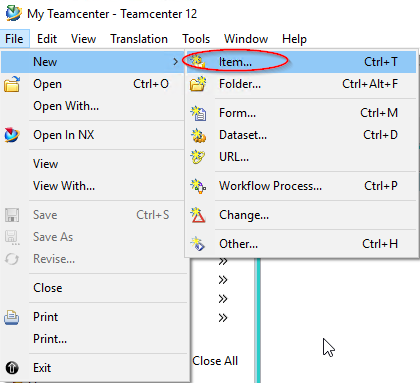
In the following menu select “FFG Engineering Item”. Please use only this part type.
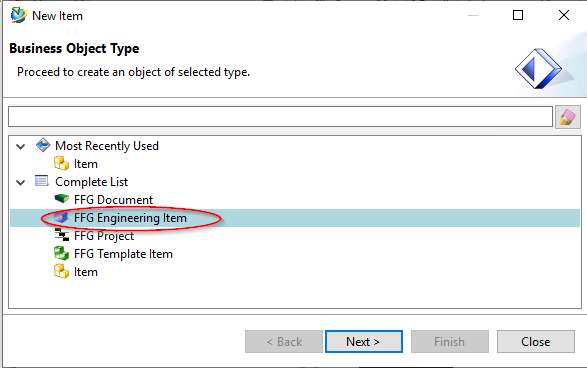
Press “Next”.

In the following dialog the properties of the item are assigned. Press “Assign” next to the “ID” field to assign a part number.
Notes:
- The rule for the part number is determined automatically via your group, e.g. the group “EI” always uses the format “X.nnnn.nnnn” and the group “FR” the format “T.nnnn.nnnn”.
- The part number is generated from a number generator and is always unique.
Enter a name of your choice. This will later be overwritten by the naming catalog.
Enter a Unit of Measure.
Important note:
- There is no entry for “piece” or “Each” as unit of measurement in Teamcenter. For “Piece/Each” please leave the unit of measurement empty, this will be implemented correctly in the SAP interface later.
- The unit of measurement can no longer be changed if the part is released or already installed.
- The unit of measurement “Piece/Each” has a special technical meaning in Teamcenter, e.g. it is only possible to enter integer quantities here. In addition, a CAD system (here NX) always creates parts without a unit of measurement.
Press “Next”.

In this dialog, you can set the mandatory attributes required for a release.
If you click in the field “Naming Catalog ID” and make an entry, all entries will be displayed from the catalog which contain this text in the German or English name. You can select a suitable name or ID here, the German and English names are then entered into the Revision and Item attributes when saving.


The “Summary” tab of the revision now shows the English and German names.
3.3 Editing Parts Information
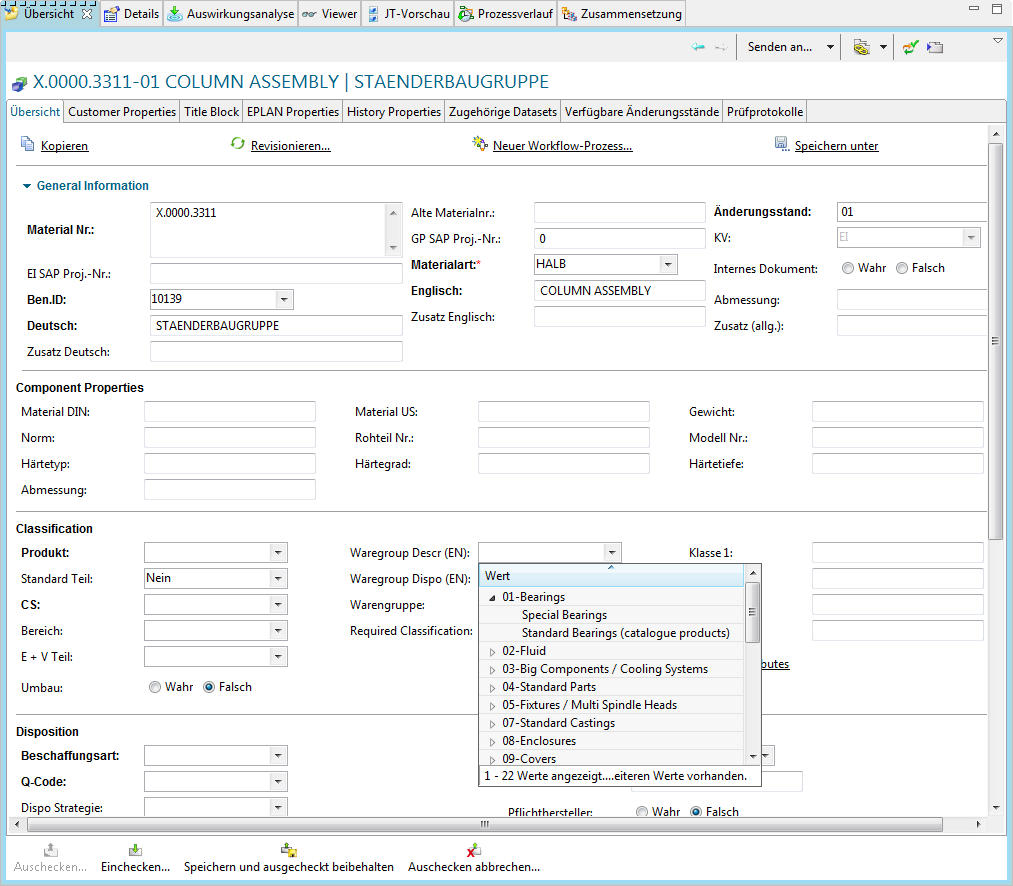
To edit the revision information, select the revision in the Navigator.
The properties are displayed in the “Summary” tab. Make sure that they are also in the Summary tab and not in another tab.

Click on “Check-Out”. The revision is checked out and the tab is set to edit mode.

You can now edit the properties. Then you can save the changes with “Check-In” or discard them with “Cancel Checkout”.
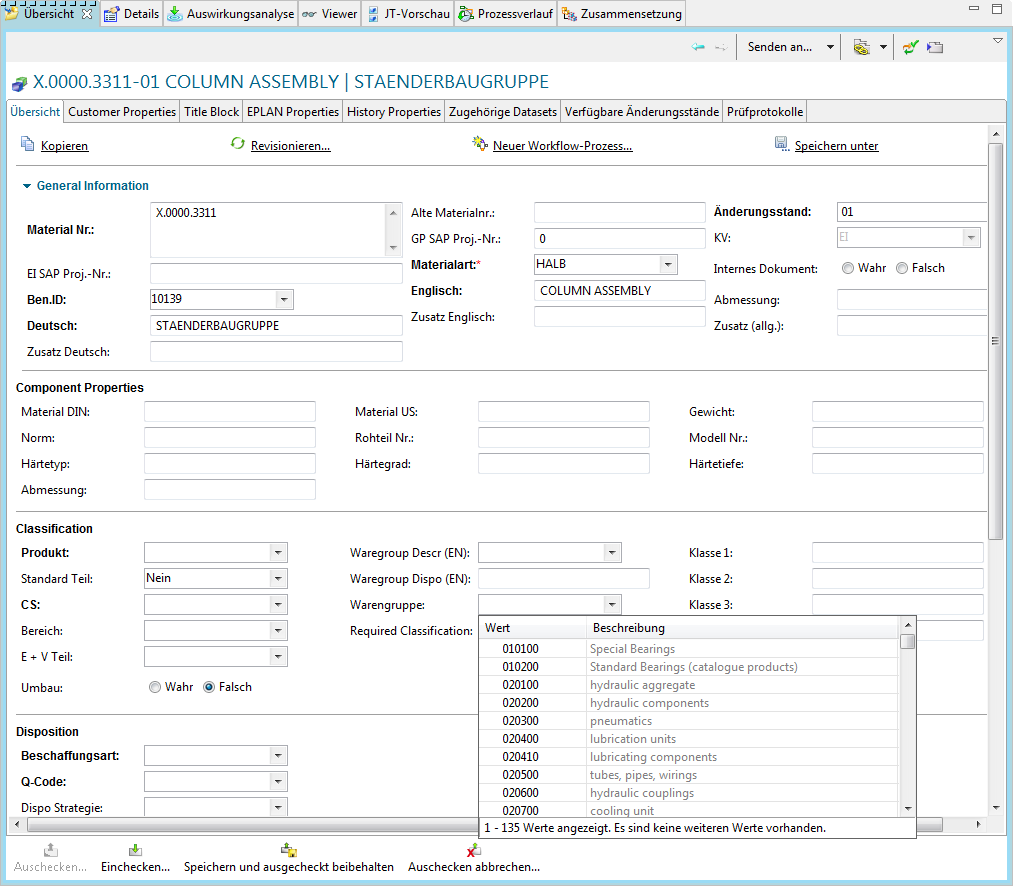
3.4 Editing the classification
The information for the product group and the classification can be edited in the tab “Classification”. To enter the product group, the revision must be checked out.
Please note:
At the moment the entries of this product group are only implemented in English! The German translations will follow.

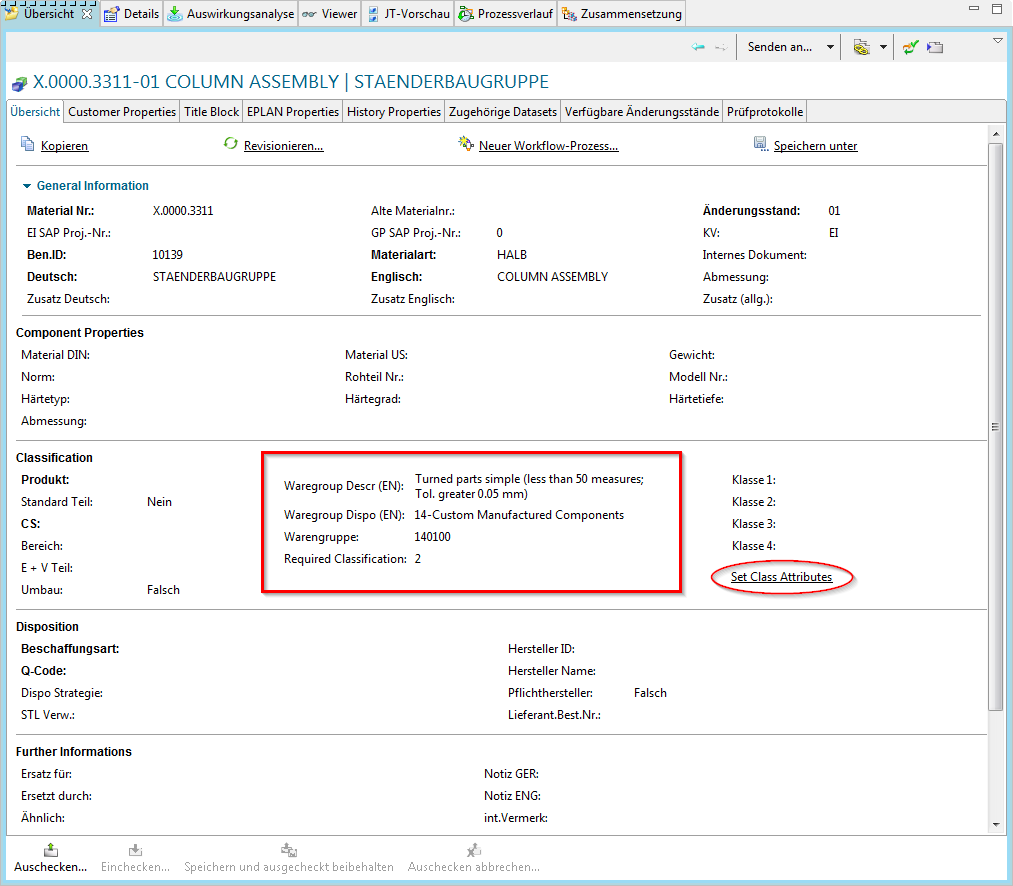
You can then enter the merchandise category. The values of the merchandise category description are structured according to categories.
Alternatively, you can also enter the number of the product group directly if you know it. Please note that the product group description field must be empty for the entry in the product group field to take effect. The description has priority over the number.
Please note that the field for the category (Waregroup Dispo) is for display only and cannot be filled in.

If a classification is required, you can set it via “Set Class Attributes” (this entry is currently only displayed in English).
A menu opens in which the classification combinations valid for the respective merchandise category are displayed. The values are - as in Agile - dependent on each other from left to right.
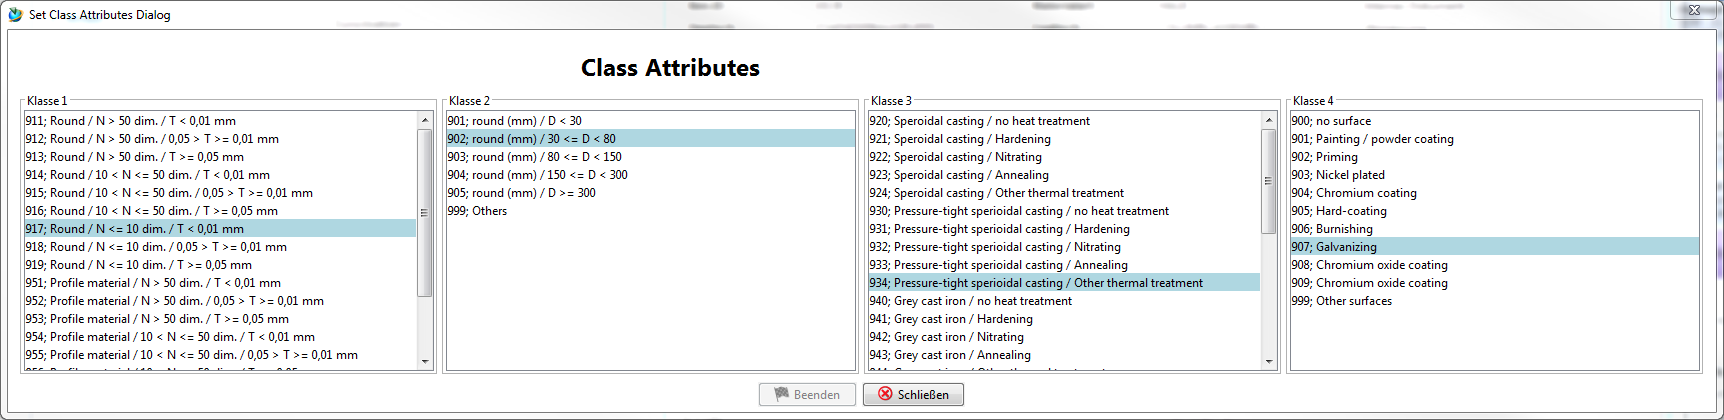
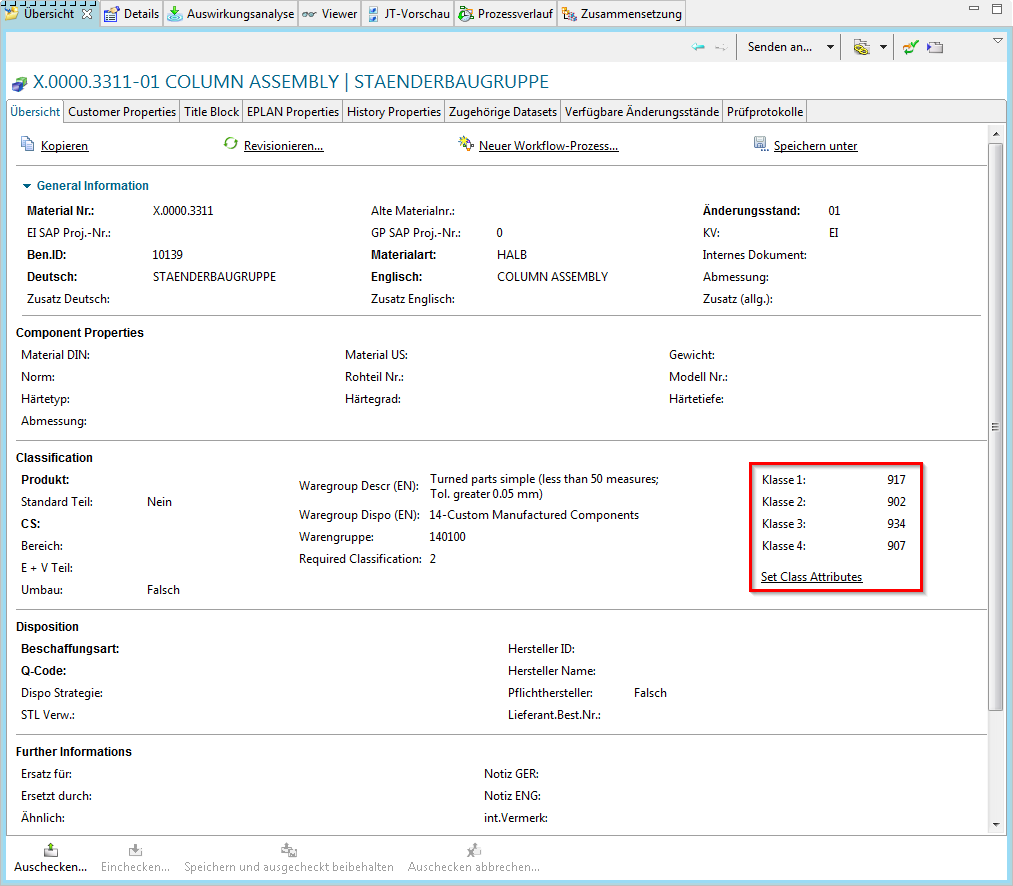
Select the required values and click on “Finish”. The values of the classification are written into the fields.
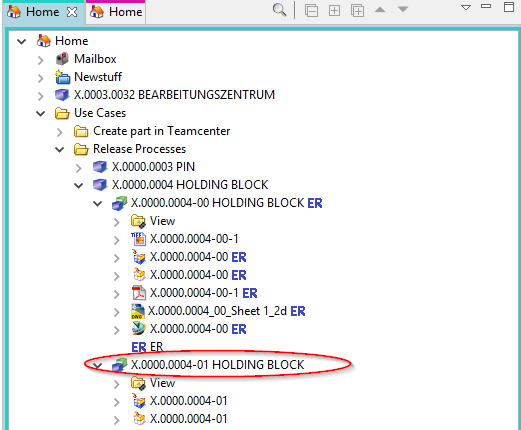
3.5 Revisioning of parts
In a PLM system, parts are revised in order to track changes. For FFG there are the following basic rules for revision:
- The revision ID is a two-digit number starting with “00”.
- A revision is only possible if the predecessor has a release status. Conversely, this means that changes can only be made to the last revision if it is not released.
- A new revision can be created from any revision level, e.g. revision 02 can be created from revision 00 or revision 01. In this case, the user must make sure that the logic is correct and that, for example, no constructive or content changes are ignored.
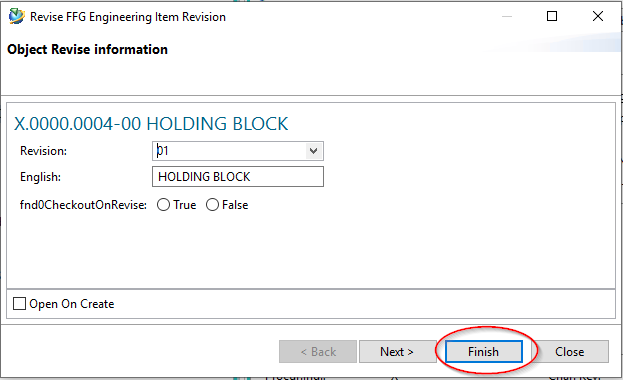
To create a new revision, select a previous revision and then choose “File → Revise…”.

Further entries are not required. Press “Finish” to complete the operation.
A second revision “01” is then displayed under the item. All specifying documents such as 3D model (UGMASTER) or drawing (UGPART) are copied to the new revision.
Note that the neutral formats (Tiff, PDF, etc.) are not copied. These will be created when the revision is released.