Benutzer-Werkzeuge
Inhaltsverzeichnis
Tc12 Basis Customizing AWC 4.x
1 Suchen in AWC (Prefilter)
1.1 AWS_SearchPreFilter_Property1
Über diese Preference wird der linke Teil des Suchfeldes konfiguriert

OOTB:
<preference name=„AWS_SearchPreFilter_Property1“ type=„String“ array=„true“ disabled=„false“ protectionScope=„User“ envEnabled=„false“>
<preference_description>Contains the required information needed to display the first PreFilter in the AWS client.
The first value should be the type name and property name in the format: type.property e.g.
POM_application_object.owning_user
The second value onwards will be the internal values for the property e.g.
infodba</preference_description>
<context name=„Teamcenter“>
<value>POM_application_object.owning_user</value>
</context>
</preference>
Weitere Möglichkeiten:
<value>POM_application_object.last_mod_date</value>
<value>$TODAY</value>
<value>$THIS_WEEK</value>
<value>$THIS_MONTH</value>
…
1.2 AWS_SearchPreFilter_Property2 (Auswählen: Kategorie)
Über diese Preference wird der mittlere Teil des Suchfeldes konfiguriert

1.2.1 AWS_SearchPreFilter_Property2
Die gezeigten Values in schwarz sind Standard AWC3.2
Rot markiert sind neue Kategorien. WICHTIG: erst in BMIDE mit Objekt verknüpfen, siehe nächster Punkt.
<preference name=„AWS_SearchPreFilter_Property2“ type=„String“ array=„true“ disabled=„false“ protectionScope=„User“ envEnabled=„false“>
<preference_description>Contains the required information needed to display the second pre-filter in the Search panel of the Active Workspace.
Valid values are in the format:
* The first value is the type and property internal names in the format "type.property" (e.g. "WorkspaceObject.object_type").
* The second value onwards is the internal values for the property (e.g. "ItemRevision").</preference_description>
<context name=„Teamcenter“>
<value>Categorization.category</value>
<value>Files</value>
<value>avaBase</value>
<value>Documents</value> ootb: Document Item und Subtypes (Av4_DocumentRevision)
<value>Parts</value> ootb: Design Item und Subtypes (Av4_MCADRevision)
<value>Changes</value>
<value>Item Revision</value>
</context>
</preference>
1.2.2 Objekt mit einer Kategorie verknüpfen (oder neue Kategorie)
OOTB:

1.2.2.1 Variante via BMIDE: Awp0BusinessObjectCategories

z.B Bestehende Kategorie plus neue Kategorie eingeben avaBase
neue Kategorien funktionieren nur über BMIDE

Template Deployen (hot)
Dann:
TC_MENU: (wichtig z.B. Preferences werden angepasst…)
bmide_modeltool.bat -u=infodba -p=infodba -g=dba -tool=all -mode=upgrade -target_dir=%TC_DATA%
Vorschlag: (Awp0BusinessObjectCategories)
| Av4_DokumentRevision | avaBase | oder Revisionen oder Parts |
| Av4_MCADRevision | avaBase | oder Revisionen oder Parts |
| Av5_DHFRevision | avaMedbase | oder Revisionen oder Documents |
| Av5_PhaseRevision | avaMedbase | oder Revisionen oder Documents |
| Av5_MilestoneRevision | avaMedbase | oder Revisionen oder Documents |
| Av5_RecordRevision | avaMedbase | oder Revisionen oder Documents |
| Av5_TFRevision | avaMedbase | oder Revisionen oder Documents |
| UGPART | Files | Indexierung: siehe Punkt 4 |
| UGMASTER | Files | Indexierung: siehe Punkt 4 |
1.2.2.2 Variante via Preference:
Wenn man die BMIDE-Variante durchführt wird diese Preference automatisch angepasst
 |
OOTB:
<preference name=„AW_FullTextSearch_TypeCategories“ type=„String“ array=„true“ disabled=„false“ protectionScope=„Site“ envEnabled=„false“>
<preference_description>Contains the list of indexed object properties.</preference_description>
<context name=„Teamcenter“>
<value>Parts:Design Revision,Part Revision</value>
<value>Documents:DocumentRevision,Specification Revision,RequirementSpec Revision,CPBriefRevision,CPMarketingBriefRevision,CPThemeBoardRevision,NX0RoutingSpecRevision,CPProductRoughRevision,EmailRevision</value>
<value>Files:PDF,MSExcelX,JPEG,Text,MSWordX,MSPowerPointX</value>
</context>
</preference>
Beispiel Avabase/avamedbase:
<preference name=„AW_FullTextSearch_TypeCategories“ type=„String“ array=„true“ disabled=„false“ protectionScope=„Site“ envEnabled=„false“>
<preference_description>Contains the list of indexed object properties.</preference_description>
<context name=„Teamcenter“>
<value>avabase:Av4_MCADRevision,Av4_DokumentRevision</value>
<value>avamedbase:Av5_DHFRevision,Av5_PhaseRevision,Av5_MilestoneRevision,Av5_RecordRevision,Av5_TFRevision</value>
<value>Parts:Av4_MCADRevision</value>
<value>Documents:Av4_DokumentRevision,Av5_RecordRevision</value>
<value>Files:UGMASTER,UGPART,PDF,MSExcelX,JPEG,Text,MSWordX,MSPowerPointX</value>
</context>
</preference>
1.3 AW_Advanced_Search_Visibility (Erweiterte Suche)
Über diese Preference wird die Auswahl Erweiterte Suche aktiviert

<preference name=„AW_Advanced_Search_Visibility“ type=„Logical“ array=„false“ disabled=„false“ protectionScope=„Site“ envEnabled=„false“>
<preference_description>Disables and hides the Advanced Search tab and corresponding link to Advanced Search. The default value is true which will enable Advanced Search tab and link.</preference_description>
<context name=„Teamcenter“>
<value>true</value>
</context>
</preference>
true ist default
2 Suchen in AWC (Erweiterte Suche, Schnellsuche (Quick)


Keyword Search entfernen wenn Tc FTS nicht zusätzlich installiert wurde
<preference name=„Quick_Access_Queries“ type=„String“ array=„true“ disabled=„false“ protectionScope=„Site“ envEnabled=„false“>
<preference_description>Defines the quick access queries to be displayed in the left-hand navigator. Valid values are the internal name of queries as defined in the qry_text_locale.xml localization file.</preference_description>
<context name=„Teamcenter“>
<value>Item ID</value>
<value>Keyword Search</value>
<value>Item Name</value>
<value>Dataset Name</value>
</context>
</preference>
<preference name=„Quick_Access_Queries_Attribute“ type=„String“ array=„true“ disabled=„false“ protectionScope=„Site“ envEnabled=„false“>
<preference_description>Defines the criteria attribute for quick access queries.
Format should be:
"<query_internal_name>_SearchAttribute=<L10N_key>", where:
<query_internal_name>is to be replaced by the query internal name,
<L10N_key>is to be replaced by the user entry L10N key of the query clause.</preference_description>
<color blue><context name=„Teamcenter“>
<value>Item ID_SearchAttribute=ItemID</value>
<value>Keyword Search_SearchAttribute=Keyword</value>
<value>Item Name_SearchAttribute=ItemName</value>
<value>Dataset Name_SearchAttribute=DatasetName</value>
</context>
</preference>
3 Suchen in AWC (Erweiterte Suche, Erweitert (Advanced)

Sortierung nur über QueryName möglich, Beispiele: (Suchen erscheinen Automatisch)
01 avasis CAD Revision
01 avasis Dokument Revision
Anzeigenamen kann im XML der Query über «language» übersteuert werden…

4 Weitere Präferenzen für Suchen
4.1 AWS_Default_Query_Operator
AND / OR
Default:
<preference name=„AWS_Default_Query_Operator“ type=„String“ array=„false“ disabled=„false“ protectionScope=„Site“ envEnabled=„false“>
<preference_description>Contains the default operator for query expressions in the Active Workspace client. Possible values are "AND" or "OR".</preference_description>
<context name=„Teamcenter“>
<value>AND</value>
</context>
</preference>
4.2 AWC_search_automatic_wildcard
0 - no wildcard
1 - asterisk as suffix (default)
2 - asterisk as prefix
3 - asterisk as suffix and prefix
Default:
<preference name=„AWC_search_automatic_wildcard“ type=„Integer“ array=„false“ disabled=„false“ protectionScope=„Site“ envEnabled=„false“>
<preference_description>Controls the automatic addition of wildcard to user search criteria.
Valid values are:
- 0: the user search criteria are not altered.
- 1: the search engine will suffix * to user values (e.g. "part" will be "part*").
- 2: the search engine will prefix * to user values (e.g. "part" will be "*part").
- 3: the search engine will prefix and suffix * to user values (e.g. "part" would become "*part*"). This is the default value.
- any other value is considered 0.
If a user adds a wildcard as part of the search criteria, no additional wildcard will be added in that place. This is the same for both prefix and suffix. (e.g. "part*" will be "part*").</preference_description>
<context name=„Teamcenter“>
<value>1</value>
</context>
</preference>
5 Indexing (Suche)
5.1 Typ für Indexing aktivieren (Business Object)
z.B. UGMASTER und UGPART
BMIDE
Business Object Constants: Awp0SearchIsIndexed

Auf True setzen:

Template Deployen (hot) und Indexing zurücksetzen
5.2 Dateibasierte Indizierung (Fulltextsearch in AWC)
OOTB ist die dateibasierte Indizierung deaktiviert. Wichtig: siehe 5.1
Zum aktivieren wird die folgende Datei bearbeitet:
Datei: %TC_ROOT%\TcFTSIndexer\conf\TcFtsIndexer_objdata.properties Zeile 60: indexDatasetFileContent=true (Valid values are true or false. Default value is false.)
Speichern
Falls noch aktiv, den TcFTSIndexer beenden.
TcFTSIndexer Cache komplett löschen (option 4): C:\plm\tc12\TcFTSIndexer\bin\runTcFTSIndexer -task=objdata:clear
TcFTSIndexer Cache komplett neu aufbauen: C:\plm\tc12\TcFTSIndexer\bin\runTcFTSIndexer -task=objdata:index

5.3 Attribut für Indexing aktivieren (Property)
Beispiel String Attribut: av4_REVISION_TEXT
- Awp0SearchIsIndexed =true
- Awp0SearchCanFilter =true
- Awp0SearchFilterPriority =170 Gruppierung nach oberster Priorität

 wird
wird 
Beispiel Array[TypedReference]: av4_PRODUCTLIST
- Awp0SearchIsIndexed =true
- Awp0SearchCanFilter =true
- Awp0SearchFilterPriority =170 Gruppierung nach oberster Priorität
- Awp0SearchPropFromRefType =object_name, awp0Item_item_id
- (Awp0SearchRefTypeNames =Av4_ProductRevision)


Template Deployen (hot) und Indexing zurücksetzen
Awp0SearchFilterPriority
Indicates the priority of the property that determines its order in the list of filters displayed in the client - the lower the value, the higher the priority. This means that the filter is positioned higher in the list of filters shown in the filters panel. Siemens PLM Software recommends that you assign values from a range in order to accommodate additional properties in the future. For example, assign priorities such as 100, 200, and 300, instead of 1, 2, and 3.
Bei einer Suche nach einer Eigenschaft kann der Anwender in AW 4.1 nun den lokalisierten Anzeigenamen für eine globale Suche nutzen. Also:
| Suche nach einem Wert in av4_MATERIAL= | Material:Edelstahl |
| Suche nach einem Wert in av4_WEIGHT= | Gewicht:1.2 (German AW) Weight:1.2 (English AW) |
| Suche nach einem Wert in av4_REVISION_TEXT „Revision Text“: | Initiale (für eine Suche nach dem Wert „Initiale Erstellung“) |
IMHO müssen wir darauf achten die Eigenschaftsindexierung am Ursprungs-Business Objekt zu definieren und nicht an den abgeleiteten Business Objekten. Auch die Nummern der Filter-Priorisierung scheinen bei „ungünstigen“ Werten nicht zu funktionieren. (Vorher hat das Material und Gewicht im 180er Filter-Bereich nicht funktioniert)
| Property | Business Object | Awp0SearchFilterPriority |
|---|---|---|
| av4_APPROVAL_DATE | Av4_avaDesignRevision bzw. Av4_avaDocumentRevision | 110 |
| av4_APPROVER_NAME | Av4_avaDesignRevision bzw. Av4_avaDocumentRevision | 111 |
| av4_APPROVER_NAME_SHORT | Av4_avaDesignRevision bzw. Av4_avaDocumentRevision | 112 |
| av4_REVIEW_DATE | Av4_avaDesignRevision bzw. Av4_avaDocumentRevision | 113 |
| av4_REVIEW_NAME | Av4_avaDesignRevision bzw. Av4_avaDocumentRevision | 114 |
| av4_REVIEW_NAME_SHORT | Av4_avaDesignRevision bzw. Av4_avaDocumentRevision | 115 |
| av4_REVISION_TEXT | Av4_avaDesignRevision bzw. Av4_avaDocumentRevision | 116 |
| av4_OFFICE_TEMPLATE | Av4_DocumentRevision | 120 |
| av4_MATERIAL | Av4_MCADRevision | 120 |
| av4_WEIGHT | Av4_MCADRevision | 121 |

OOTB Werte (Richtlinie)
| object_type | 100 |
| awb0UnderlyingObjectType | 100 |
| priority | 175 |
| fnd0state | 175 |
| start_date | 180 |
| fnd0status | 180 |
| priority | 185 |
| finish_date | 190 |
| start_date | 190 |
| complete_percent | 196 |
| task_type | 197 |
| owning_user | 200 |
| awb0ArchetypeRevOwningUser | 200 |
| owning_user | 200 |
| owning_group | 201 |
| awb0ArchetypeRevOwningGroup | 201 |
| release_status_list | 300 |
| awb0ArchTypeRevRelStatNames | 300 |
| date_released | 301 |
| last_mod_user | 400 |
| awb0ArchetypeRevLastModUser | 400 |
| last_mod_date | 401 |
| awb0ArchetypeRevLastModDate | 401 |
| project_list | 500 |
| gov_classification | 600 |
| ip_classification | 601 |
| fnd0InProcess | 700 |
| s2clRatingValue | 1000 |
| s2clIsBestAnswer | 2000 |
| s2clIsOpen | 2000 |
| s2clTotalCommentsFmSy | 2001 |
| s2clAverageRatingFmSy | 2002 |
| s2clTotalRatingsFromSummary | 2003 |
| … |
5.4 RevisionsTyp für StructureIndexing und Anzeige Content Tab aktivieren
Diese Anpassung ist auch zur Darstellung von Stücklisten in AWC Notwendig
Specifies the business objects that can have a structure under it. If you want to display a custom business object in the Content tab, add the custom business object to this constant. This constant is added by the Active Content Structure template (activeworkspacebom).
BMIDE:
In dependency.xml


RMB auf Awb0SupportsStructure


Edit

z.B. (alle Typen die eine Struktur haben können)
Av4_MCADRevision
Av5_DHFRevision
Av5_PhaseRevision
Av5_MilestoneRevision

Hotdeploy…
6 Icons für Custom Typen
Beispiel Nomenklatur für MCAD Item:
typeAv4_MCAD48.svg

typeAv4_MCADRevision48.svg

Icons nach: c:\plm\tc12\aws2\stage\src\image kopieren

Tc-menu starten
Cd C:\plm\tc12\aws2\stage
Gwtcompile…

C:\plm\tc12\aws2\stage\out\awc.zip oder awc.war deployen…


Altes assets…-Verzeichnis weglöschen
7 XMLRenderingStyleSheet’s für Custom Typen
Import wird über 00_init_Tc11.2_avabase\stylesheets, stylesheets.bat gesteuert oder direkt im BMIDE-Tempalte
Wenn im RAC ein Stylesheet erstellt wird muss jeweils ein entsprechendes für den AWC definiert werden da sonst das RAC-Stylesheet verwendet wird und so Fehlermeldungen angezeigt werden oder Funktionen nicht mehr gehen (create Item…).
Beispiele:


7.1 ItemSummary Stylesheet
Als Grundlageverwenden: Awp0ItemSummary oder Awp0PartSummary
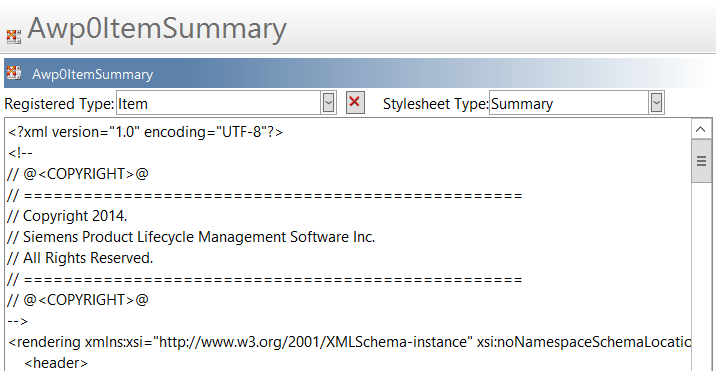
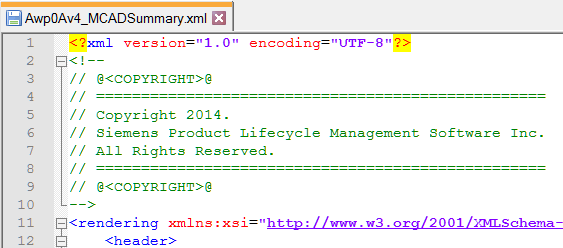
Für jeden Kundenspezifischen Typ auf Basis des Awp0ItemSummary ein eigenes XML erstellen und die entsprechenden Attribute einpflegen:
Beispiele:
Awp0Av4_MCADSummary.xml
Awp0Av4_DokumentSummary.xml
Präferenz erstellen:
Rot Markiert entspricht Typ
Grün Markiert entspricht Stylesheet Name
<preference name=„AWC_Av4_MCAD.SUMMARYRENDERING“ type=„String“ array=„false“ disabled=„false“ protectionScope=„User“ envEnabled=„false“>
<preference_description>Description not provided during import.</preference_description>
<context name=„Teamcenter“>
<value>Awp0Av4_MCADSummary</value>
</context>
</preference>
7.2 ItemRevSummary Stylesheet
Als Grundlageverwenden: Awp0ItemRevSummary oder Awp0PartRevisionSummary
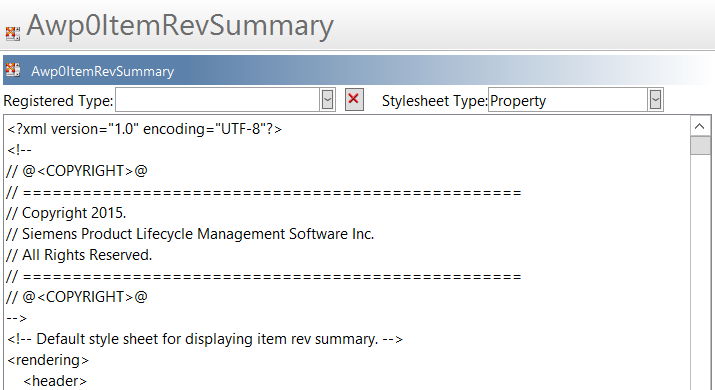
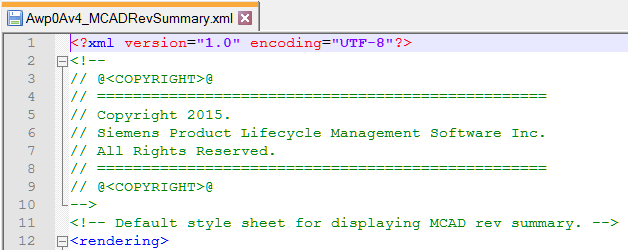
Für jeden Kundenspezifischen Typ auf Basis des Awp0ItemRevSummary ein eigenes XML erstellen und die entsprechenden Attribute einpflegen:
Beispiele:
Awp0Av4_MCADRevSummary.xml
Awp0Av4_DokumentRevSummary.xml
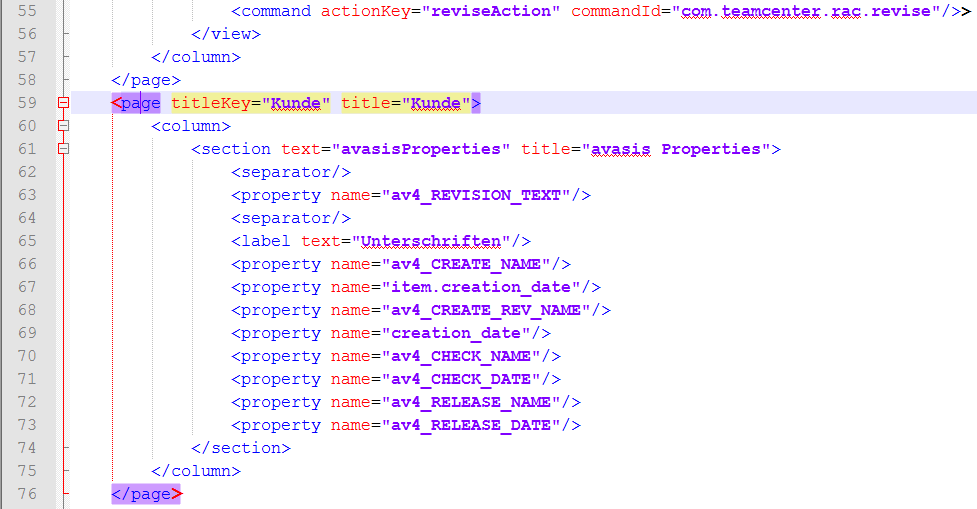
…titleKey funktioniert so (sollte genauer Untersucht werden…)
<page titleKey=„Kunde“>

Präferenzen erstellen:
Rot Markiert entspricht Typ
Grün Markiert entspricht Stylesheet Name
<preference name=„AWC_Av4_MCADRevision.SUMMARYRENDERING“ type=„String“ array=„false“ disabled=„false“ protectionScope=„User“ envEnabled=„false“>
<preference_description>Description not provided during import.</preference_description>
<context name=„Teamcenter“>
<value>Awp0Av4_MCADRevSummary</value>
</context>
</preference>
<preference name=„AWC_Av4_MCADRevision.showObjectLocation.OccurrenceManagementSubLocation.SUMMARYRENDERING“ type=„String“ array=„false“ disabled=„false“ protectionScope=„User“ envEnabled=„false“>
<preference_description>Registration of summary stylesheet for Part Revision for ShowObject Location and OccurrenceManagement SubLocation.</preference_description>
<context name=„Teamcenter“>
<value>Awp0Av4_MCADRevSummary</value>
</context>
</preference>
<preference name=„AWC_Av4_MCADRevision.showObjectLocation.objectNavigationSubLocation.SUMMARYRENDERING“ type=„String“ array=„false“ disabled=„false“ protectionScope=„User“ envEnabled=„false“>
<preference_description>Registration of summary stylesheet for Part Revision for ShowObject Location and Navigate SubLocation.</preference_description>
<context name=„Teamcenter“>
<value>Awp0Av4_MCADRevSummary</value>
</context>
</preference>
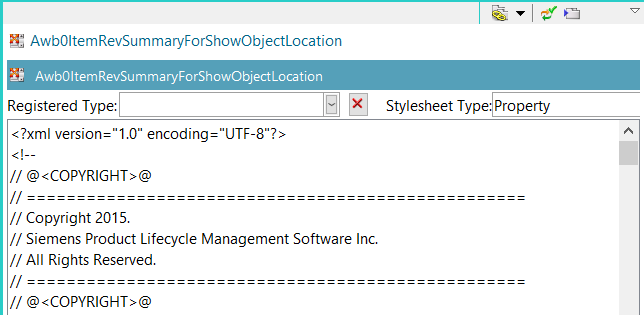
7.3 ItemRevSummaryForShowObjectLocation Stylesheet
Als Grundlage verwenden: Awb0ItemRevSummaryForShowObjectLocation oder Awp0PartRevisionSummaryForShowObjectLocation
Dieses Stylesheet ist für die Anzeige von Stücklisten unumgänglich!!!!
Für jeden Kundenspezifischen Typ auf Basis des Awb0ItemRevSummaryForShowObjectLocation ein eigenes XML erstellen und die entsprechenden Attribute einpflegen:
Beispiele:
Awb0Av4_MCADRevSummaryForShowObjectLocation.xml
Awb0Av4_DokumentRevSummaryForShowObjectLocation.xml


Markierte Zeile anpassen (wenn vorhanden)

Präferenz erstellen:
Rot Markiert entspricht Typ
Grün Markiert entspricht Stylesheet Name
<preference name=„AWC_Av4_MCADRevision.showObjectLocation.SUMMARYRENDERING“ type=„String“ array=„false“ disabled=„false“ protectionScope=„User“ envEnabled=„false“>
<preference_description>Registration of summary stylesheet for Item Revision for ShowObject Location.</preference_description>
<context name=„Teamcenter“>
<value>Awb0Av4_MCADRevSummaryForShowObjectLocation</value>
</context>
</preference>
7.4 ItemCreate Stylesheet
Besser BMIDE: Operation Descriptor, CreateInput verwenden
Als Grundlageverwenden: Awp0ItemCreate
Für jeden Kundenspezifischen Typ auf Basis des Awp0ItemCreate ein eigenes XML erstellen und die entsprechenden Attribute einpflegen:
Beispiele:
Awp0Av5_RecordCreate.xml
…
Präferenz erstellen:
Rot Markiert entspricht Typ
Grün Markiert entspricht Stylesheet Name
<preference name=„AWC_Av4_Document.CREATERENDERING“ type=„String“ array=„false“ disabled=„false“ protectionScope=„User“ envEnabled=„false“>
<preference_description>Description not provided during import.</preference_description>
<context name=„Teamcenter“>
<value>Awp0Av4_DocumentCreate</value>
</context>
</preference>
7.5 visibleWhen
Help: …, Administration, XRT element reference, property
Defines the conditional display of a property based on one of two types of expressions comparing a property or preference to a value. The value can be null or a string, including a string containing wildcard characters. Multiple values can be checked with an array property or preference. When checking an array value, use a comma as a delimiter for the values. The two types of expressions check the following:
1. The value of a property on the selected object
<property name=„p1“ visibleWhen=„<Property name>==<Some value>“/>
<property name=„p1“ visibleWhen=„<Property name>!=<Some value>“/>
<property name=„p1“ visibleWhen=„<Property name>==null“/>
<property name=„p1“ visibleWhen=„<Property name>!=null“/>
2. The value of a Teamcenter preference
<property name=„p1“ visibleWhen=„{pref:<Preference name>}==<Some value>“/>
<property name=„p1“ visibleWhen=„{pref:<preference name>}!=<Some value>“/>
* To check the value of a property on the selected object, use the real (database) name of the property in the expression.
If you want to show a „myprop “ property only if the object_desc property begins with the word Testing , use the following:
<property name=„myprop“ visibleWhen=„object_desc==Testing*“/>
* To check the value of a Teamcenter preference, use {pref:preference-name} to differentiate it from a property-based expression. Following are some examples:
Display a property when the Cust_Enable_MyProp preference is set to true .
<property name=„myprop“ visibleWhen=„{pref:Cust_Enable_MyProp}==true“>
| Note | Using visibleWhen for properties is only for use in SWT-based style sheet views in the rich client. For example, Summary (when checked out), Create , and SaveAs . It will only work with SWT-based property beans, and will not work with Swing-based property beans. In the current implementation of SWT styles aheet rendering in the Summary view, a plain Label instead of a LabelPropertyBean is used to display property values in read-only mode (RenderFlat ). Since the visibleWhen framework implementation is based on AbstractPropertyBeans and its children, the visibleWhen feature will not be available in the Summary view in read-only mode. It will only be available when the object is checked-out. |
7.6 Zum XRTEditor
Zum einfachen Editieren der Stylesheets kann der XRTEditor verwendet werden (nur infodba).
Dazu müssen die Stylesheets aber im System erfasst sein.
8 NX Integration
Gemäss Configuration.pdf
Problem mit NX12:
PR 9061464
NX12 does not start from Active Workspace 3.4
Solution
Siemens PLM believes that the problem you reported where NX12 does not start from Active Workspace 3.4 will be resolved by code changes made to the release of our product version AW4.0
8.1 ActiveWorkspaceHosting.NX.URL
URL entsprechend anpassen… (zum deaktivieren einfach Präferenz wieder löschen)
Kann auch Gruppenspezifisch eingerichtet werden)
<preference name=„ActiveWorkspaceHosting.NX.URL“ type=„String“ array=„false“ disabled=„false“ protectionScope=„Site“ envEnabled=„false“>
<preference_description>Specifies the URL used by Teamcenter Integration for NX to communicate with Active Workspace for hosted operations such as search, open item, and others. This preference is evaluated before ActiveWorkspaceHosting.URL, which takes precedence.</preference_description>
<context name=„Teamcenter“>
<value>http://avademo17: 7070/awc/</value>
</context>
</preference>
8.2 AWC_NX_AddComponentSupportedTypes ???????????????
<preference name=„AWC_NX_AddComponentSupportedTypes“ type=„String“ array=„true“ disabled=„false“ protectionScope=„Site“ envEnabled=„false“>
<preference_description>Enables the specified object types to be added as a component in Teamcenter
Integration for NX when selected in Active Workspace. Only Item, ItemRevision, and
dataset types and subtypes are supported.
Add the values as applicable to your site from the available types provided
out-of-the-box. You can also add additional object types in accordance with the
requirements at your site.
The following values are available out of the box:
- Item
- ItemRevision
- UGMASTER
- UGALTREP
- DirectModel</preference_description>
<context name=„Teamcenter“>
<value>Item</value>
<value>ItemRevision</value>
<value>UGMASTER</value>
<value>UGALTREP</value>
<value>DirectModel</value>
</context>
</preference>
8.3 AWC_NX_OpenSupportedTypes ????????????????????????
<preference name=„AWC_NX_OpenSupportedTypes“ type=„String“ array=„true“ disabled=„false“ protectionScope=„Site“ envEnabled=„false“>
<preference_description>Enables the specified object types to be opened in Teamcenter Integration for NX
when selected in Active Workspace. Only Item, ItemRevision, and dataset types and
subtypes are supported.
Add the values as applicable to your site from the available types provided
out-of-the-box (OOTB). You can also add additional object types in accordance with
the requirements at your site.
The following values are available out of the box:
- Item
- ItemRevision
- UGMASTER
- UGALTREP
- DirectModel
- UGPART
- CAEGeom
- CAEMesh
- CAESolution
- NXMotion</preference_description>
<context name=„Teamcenter“>
<value>Item</value>
<value>ItemRevision</value>
<value>UGMASTER</value>
<value>UGALTREP</value>
<value>DirectModel</value>
<value>UGPART</value>
<value>CAEGeom</value>
<value>CAEMesh</value>
<value>CAESolution</value>
<value>NXMotion</value>
</context>
</preference>
8.4 NX aus AWC starten
Damit NX aus AWC gestartet werden kann muss auf dem Client Java installiert sein. Am besten gleich wie bei den TC-Clients
C:\plm\java\jre8
Zusätzlich muss die Umbegungsvariable JAVA_HOME mit dem entsprechenden Verzeichnis definiert werden.
8.5 Den Teamcenter Navigator für immer Sichtbar machen
PROBLEM:
When running embedded Active Workspace inside NX, the Teamcenter Navigator is disabled. Teamcenter Navigator should be enabled at all times, whether embedded Active Workspace is enabled or not.
REMEDY:
To enable Teamcenter Navigator set the environment variable, UGII_ENABLE_TC_NAVIGATOR=1
Beginning with NX 12.0.1 this action will no longer be required.
However, you can still use the environment variable to disable Teamcenter Navigator by setting the environment variable, UGII_ENABLE_TC_NAVIGATOR = 0
9 Office Integration
Gemäss Configuration.pdf
9.1 ActiveWorkspaceHosting.Office.URL
URL entsprechend anpassen…
<preference name=„ActiveWorkspaceHosting.Office.URL“ type=„String“ array=„false“ disabled=„false“ protectionScope=„Site“ envEnabled=„false“>
<preference_description>Specifies the URL used by Teamcenter Client for Microsoft Office to communicate with
Active Workspace for hosted operations such as search, open item, and others.
This preference is evaluated before ActiveWorkspaceHosting.URL, which takes
precedence.</preference_description>
<context name=„Teamcenter“>
<value>http://avademo17:7070/awc/</value>
</context>
</preference>
9.2 TC_Use_ActiveWorkspace_Create
Sitepreference:
Wenn Gruppenpreference dann muss protectionScope=»Group»
<preference name=„TC_Use_ActiveWorkspace_Create“ type=„Logical“ array=„false“ disabled=„false“ protectionScope=„Site“ envEnabled=„false“>
<preference_description>Specifies whether to display the Active Workspace creation tab instead of the host environment
(rich client or Office client) creation when you click New in the host environment. Set the
preference to True.</preference_description>
<context name=„Teamcenter“>
<value>true</value>
</context>
</preference>
9.3 TC_Use_ActiveWorkspace_Inbox
Sitepreference:
Wenn Gruppenpreference dann muss protectionScope=»Group»
<preference name=„TC_Use_ActiveWorkspace_Inbox“ type=„Logical“ array=„false“ disabled=„false“ protectionScope=„Site“ envEnabled=„false“>
<preference_description>Specifies whether to display the Active Workspace inbox instead of the host environment (rich
client or Office client) inbox when you click My Worklist in the host environment. Set the
preference to True</preference_description>
<context name=„Teamcenter“>
<value>true</value>
</context>
</preference>
9.4 TC_Use_ActiveWorkspace_Summary
Sitepreference:
Wenn Gruppenpreference dann muss protectionScope=»Group»
<preference name=„TC_Use_ActiveWorkspace_Summary“ type=„Logical“ array=„false“ disabled=„false“ protectionScope=„Site“ envEnabled=„false“>
<preference_description>Specifies whether to display the Active Workspace summary when viewing the summary for
objects instead of the host environment (rich client or Office client). Set the preference to True</preference_description>
<context name=„Teamcenter“>
<value>true</value>
</context>
</preference>
9.5 AWC_OC_OpenSupportedTypes ????????????????
Values anpassen:
<preference name=„AWC_OC_OpenSupportedTypes“ type=„String“ array=„true“ disabled=„false“ protectionScope=„Site“ envEnabled=„false“>
<preference_description>Enables opening the specified object types in Teamcenter Client for Microsoft Office
when selected in Active Workspace.
Valid Values:
MSWord
MSWordX
MSWordTemplateX
MSWordTemplate
MSExcel
MSExcelX
MSExcelTemplateX
MSExcelTemplate
Outlook
MSPowerPointX
MSPowerPoint
MSPowerPointTemplate</preference_description>
<context name=„Teamcenter“>
<value>MSWordX</value>
<value>MSExcelX</value>
<value>MSPowerPointX</value>
<value>Outlook</value>
</context>
</preference>
9.6 Problembehandlung
InternetExplorer 11 öffnet keine Office-Word Dokumente (nur xml wird angezeigt…
(gemäss Doku Siemens unter Internet…)
10 AWC_DefaultCreateTypes
Diese Präferenz schränkt zusätzlich die Typenanzeigeregeln aus BMIDE ein.
Bei Anpassungen muss man sich neu Anmelden.
Rot= OOTB
<preference name=„AWC_DefaultCreateTypes“ type=„String“ array=„true“ disabled=„false“ protectionScope=„Site“ envEnabled=„false“>
<preference_description>Define the types to be displayed in the "Create" dialog in the Active Workspace Client (AWC).
Valid values are types internal names.
All subtypes associated to a provided type will also be displayed.</preference_description>
<context name=„Teamcenter“>
<value>Av4_MCAD</value>
<value>Av4_Dokument</value>
<value>Av5_avaMedbase</value>
<value>Item</value>
<value>Folder</value>
<value>CompanyContact</value>
<value>CompanyLocation</value>
</context>
</preference>
11 DOCUMENT ERSTELLEN, NEUES TEIL in Homepage ausblenden da andere Typen verwendet werden
Hinter diesem Tile ist der OOTB Item-Type Document hinterlegt. Wenn nicht Verwendet, sollte das Tile ausgeblendet werden
Suche, General…, Type=Tile Collection
Site-TileCollection
Ev alle Userspezifischen löschen?????? (braucht es nicht)
TCAWWorkspace-TileCollection aufklappen:
«Create Document» auswählen: (das Gleiche mit «New Part»)
Hidden: auf True setzen und speichern
12 Neues Tile für MCAD und Dokument erstellen
verschieben nach
Installation und Icons sind im Repository avabase abgelegt.
Icons zuvor in AWC implementieren gemäss Anleitung: (gwtcompile iis…)
homeAv4_MCAD64.svg
homeAv4_Document64.svg
Kopie von Datei c:\plm\tc12\aws2\data\Awp0aws2GatewayTilesCots_Install.xml mit folgendem Namen erstellen:
Awp0aws2GatewayTilesa_vabase_Install.xml und folgendermassen editieren
Achtung Dokument versus Document (wegen ootb Document)
<?xml version=„1.0“ encoding=„iso-8859-1“?>
<!DOCTYPE ActiveWorkspaceGateway SYSTEM „Awp0aws2ActiveWorkspaceGateway.dtd“ >
<ActiveWorkspaceGateway version=„1.0“>
<!– Tile Template definitions begins here –>
<TileTemplate templateId=„Awp0HomeFolderCreateAv4_MCADTemplate“>
<ThemeIndex index=„1“ />
<Icon>Av4_MCAD</Icon>
<Action>Awp0ShowHomeFolder;cmdId=Awp0ShowCreateObject;</Action>
<ActionType type=„3“ />
</TileTemplate>
<TileTemplate templateId=„Awp0HomeFolderCreateAv4_DocumentTemplate“>
<ThemeIndex index=„1“ />
<Icon>Av4_Document</Icon>
<Action>Awp0ShowHomeFolder;cmdId=Awp0ShowCreateObject;</Action>
<ActionType type=„3“ />
</TileTemplate>
<!– Tile definitions begins here –>
<Tile tileId=„Awp0CreateAv4_MCADTile“ templateId=„Awp0HomeFolderCreateAv4_MCADTemplate“>
<Name>New MCAD</Name>
<Parameter>cmdArg=Av4_MCAD</Parameter>
</Tile>
<Tile tileId=„Awp0CreateAv4_DocumentTile“ templateId=„Awp0HomeFolderCreateAv4_DocumentTemplate“>
<Name>New Document</Name>
<Parameter>cmdArg=Av4_Document</Parameter>
</Tile>
<!– Tile collection(Site) definitions begins here –>
<TileCollection>
<SiteScope/>
<!– Hiding the inbox tile. This tile will become visible when workflow server module will be installed –>
<CollectionTiles tileId=„Awp0CreateAv4_MCADTile“ groupName=„quicklinks“ size=„0“ ></CollectionTiles>
<CollectionTiles tileId=„Awp0CreateAv4_DocumentTile“ groupName=„quicklinks“ size=„0“ ></CollectionTiles>
</TileCollection>
</ActiveWorkspaceGateway>
Import der neuen Tiles
aws2_install_tilecollections -u=infodba -p=infodba -g=dba -mode=add -file= Awp0aws2GatewayTiles_avabase_Install.xml
13 Das «Hilfe» Tile konfigurieren
Im Standard ist die Onlinehilfe von Siemens hinterlegt wofür es ein WebKey Login braucht.
Hilfe für eine lokale Installation habe ich bisher nicht gefunden (Stand 2018-02-01)
You can configure the HELP tile to link to a different location. For example, you may want to run Active Workspace help from your own documentation server.
To change how the HELP tile launches online help, you must change the settings in the
Awp0QuickStartTemplate tile template:
1. In the Teamcenter rich client, perform a General search for Type=Tile and Name=Help.
2. View the properties of the HELP tile and note that Awp0QuickStartTemplate is set as the tile template.
3. Click the Awp0QuickStartTemplate link to open the tile template and then check it out to make it editable.
Falls auschecken nicht funktioniert: Direkt Awp0QuickStartTemplate suchen (General) und editieren
4. To change the launch location for the online help, change the value in the Action box.
To change the type of action to take, change the value in the Action Type box. For example, 1 opens the provided URL in a new window or tab.
https://docs.plm.automation.siemens.com/tdoc/aw/3.4/aw_html_collection
wird z.B.
http://avademo17:8282/tdoc/aw/4.1/aw_html_collection/
5. Save and check in the tile template.
Users must sign out of Active Workspace and sign in again to see the changes to the HELP
tile action.
14 CellProperties - Präferenzen
14.1 ItemRevision.CellProperties
OOTB:
<preference name=„ItemRevision.CellProperties“ type=„String“ array=„true“ disabled=„false“ protectionScope=„Site“ envEnabled=„false“>
<preference_description>Defines the list of properties that are to be displayed under a cell for objects of type ItemRevision in the Active Workspace client.
Valid values are property internal names.</preference_description>
<context name=„Teamcenter“>
<value>object_name</value>
<value>item_id</value>
<value>item_revision_id</value>
</context>
</preference>
Beispiel Typenspezifische Präferenz für Av4_DokumentRevision.CellProperties:
<preference name=„Av4_DokumentRevision.CellProperties“ type=„String“ array=„true“ disabled=„false“ protectionScope=„Site“ envEnabled=„false“>
<preference_description>Defines the list of properties that are to be displayed under a cell for objects of type ItemRevision in the Active Workspace client.
Valid values are property internal names.</preference_description>
<context name=„Teamcenter“>
<value>object_name</value>
<value>item_id</value>
<value>item_revision_id</value>
<value>av4_REVISION_TEXT</value>
</context>
</preference>
14.2 Item.CellProperties
OOTB:
<preference name=„Item.CellProperties“ type=„String“ array=„true“ disabled=„false“ protectionScope=„Site“ envEnabled=„false“>
<preference_description>Defines the list of properties that are to be displayed under a cell for objects of type Item in the Active Workspace client.
Valid values are property internal names.</preference_description>
<context name=„Teamcenter“>
<value>object_name</value>
<value>item_id</value>
</context>
</preference>
Beispiel Typenspezifische Präferenz: Av4_Dokument.CellProperties:
14.3 Dataset.CellProperties
OOTB:
<preference name=„Dataset.CellProperties“ type=„String“ array=„true“ disabled=„false“ protectionScope=„Site“ envEnabled=„false“>
<preference_description>Active Workspace Tile Properties</preference_description>
<context name=„Teamcenter“>
<value>object_name</value>
<value>object_type</value>
<value>release_status_list</value>
<value>owning_user</value>
<value>last_mod_date</value>
</context>
</preference>
15 Client-side rendering JTPART (Universal Viewer)
15.1 Preference: AWC_defaultViewerConfig.VIEWERCONFIG
SEARCHORDER erweitern: (Beispiel Av4_MCADRevision)
Als Beispiel kann der bestehende Eintrag für «Part Revision» verwendet werden:
SEARCHORDER.Part Revision=
TC_Attaches,IMAN_manifestation,IMAN_reference,IMAN_Rendering,IMAN_specification
Kopieren nach:
SEARCHORDER.Av4_MCADRevision=
TC_Attaches,IMAN_manifestation,IMAN_reference,IMAN_specification,IMAN_Rendering
JTPART Viewer anpassen:
Damit wird das JT auf dem Client gerendert und Vis Server Manager auf dem Server braucht keine Grafikkarte mehr, kann also Virtuel aufgesetzt werden
Wichtig: Browser muss WebGL unterstützen (Internet Explorer 11 and later)
Neu über Preferences
DirectModel.Awp0JTViewer=JTPART
ersetzen durch:
DirectModel.Awp03dViewerExtended=JTPART
<preference name=„AWV0ViewerRenderOption“ type=„String“ array=„false“ disabled=„false“ protectionScope=„User“ envEnabled=„false“>
<preference_description>Determines which rendering technology should be used in Active Workspace 3D tab.
The valid values are:
CSR: Client Side Rendering technology will be used while displaying the 3D tab in Active Workspace.
SSR: Server Side Rendering technology will be used while displaying the 3D tab in Active Workspace. This is default value.</preference_description>
<context name=„Teamcenter“>
<value>CSR</value>
</context>
</preference>
<preference name=„AWV02DViewerRenderOption“ type=„String“ array=„false“ disabled=„false“ protectionScope=„User“ envEnabled=„false“>
<preference_description>Determines which rendering technology should be used in Active Workspace 2D viewer.
The valid values are:
CSR: Client Side Rendering technology will be used while displaying 2D tab in Active Workspace.
SSR: Server Side Rendering technology will be used while displaying 2D tab in Active Workspace. This is default value.</preference_description>
<context name=„Teamcenter“>
<value>CSR</value>
</context>
</preference>
OOTB AWC_defaultViewerConfig.VIEWERCONFIG mit anpassungen gelb markiert
<preference name=„AWC_defaultViewerConfig.VIEWERCONFIG“ type=„String“ array=„true“ disabled=„false“ protectionScope=„Site“ envEnabled=„false“>
<preference_description>Defines the default viewer configuration for Active Workspace.
The format of SEARCHORDER entry should be as follows: SEARCHORDER.<Business_Object_Type>=<GRM1>,<GRM2>,<GRM3>…
The format of Dataset-Viewer mappings should be as follows: <Dataset_Type>.<Viewer_Name>=<reference_Name></preference_description>
<context name=„Teamcenter“>
<value>SEARCHORDER.DocumentRevision=TC_Attaches,IMAN_reference</value>
<value>SEARCHORDER.Part Revision=TC_Attaches,IMAN_manifestation,IMAN_reference,
IMAN_Rendering,IMAN_specification</value>
<value>SEARCHORDER.Av4_MCADRevision=TC_Attaches,IMAN_manifestation,
IMAN_reference,IMAN_specification,IMAN_Rendering
<value>SEARCHORDER.ItemRevision=IMAN_manifestation,SimplifiedRendering,
IMAN_specification,IMAN_reference,IMAN_Motion,IMAN_3D_snap_shot,
IMAN_Rendering,TC_Attaches,Fnd0DiagramSnapshot</value>
<value>SEARCHORDER.Signoff=root_target_attachments</value>
<value>SEARCHORDER.EPMTask=root_target_attachments</value>
<value>SEARCHORDER.Item=revision_list</value>
<value>SEARCHORDER.Folder=contents</value>
<value>SEARCHORDER.WorkspaceObject=release_status_list</value>
<value>HTML.Awp0HTMLViewer=HTML</value>
<value>PDF.Awp0PDFViewer=PDF_Reference</value>
<value>Image.Awp0ImageViewer=Image</value>
<value>Bitmap.Awp0ImageViewer=Image</value>
<value>SnapShotViewData.Awp0ImageViewer=Image</value>
<value>JPEG.Awp0ImageViewer=JPEG_Reference</value>
<value>Text.Awp0TextViewer=Text</value>
<value>DirectModel.Awp0JTViewer=JTPART</value>
<!– <value>DirectModel.Awp03dViewerExtended=JTPART</value> –> (war früher so)
<value>GIF.Awp0ImageViewer=GIF_Reference</value>
<value>UGMASTER.Awp0ImageViewer=UG-QuickAccess-Binary</value>
<value>UGPART.Awp0ImageViewer=UG-QuickAccess-Binary</value>
</context>
</preference>
15.2 Zugehöriges Stylesheet anpassen (z.B. Awp0Av4_MCADRevSummary)
Möchte man in einem Stylesheet das JT anzeigen lassen, muss folgendes implementiert werden.
Achtung: Dadurch wird immer das Rendering gestartet was einiges an Ressourcen braucht…
Mit AWC 4.1 nicht mehr so machen!!!!
Im „titleKey=„tc_xrt_Overview“ folgende Zeile Einfügen:
<inject type=„dataset“ src=„Sci1Av4_MCADRevSummary“/>
Sci1Av4_MCADRevSummary wird folgendermassen zusammengestellt:
Sci «+» Name Stylesheet ohne Awp0
Sci«+» Awp0Av4_MCADRevSummary
15.3 Ergebnis
Das JTPART sieht man nun im OVERVIEW Tab einer MCADRevision
Ev ist «Windows 10 JT2Go Universal App» notwendig
16 Debugger: F12
17 Zusätzliche Attribute als Spalte in Oberfläche anzeigen
Exportieren des config-files
export_uiconfig -u=infodba -p=infodba -g=dba -file=c:\temp\ui.xml
USAGE: export_uiconfig [-u=<username>] { [-p=<password> | -pf=<password file>] } [-g=<groupname>] <args>
[-u=<user_id>] TC user ID. In most cases the TC user ID will
be infodba or another TC user ID with system
administrative privileges. If this argument is used
without a value, the operating system user name is used.
[-p=<password>] TC password associated with the -u=<user_id>.
[-pf=<password file>] Used in lieu of -p=<password> option for advanced security.
Specifies the file (with absolute path) that contains TC administrator's
password.
[-g=<group-name>] TC group associated with the -u=<user_id>. If this
argument is not given or used without a value, the
user's default group is assumed.
[-for_group=<group-name>]
TC group specific to which ui config objects
are exported. If for_group and for_role
are not mentioned, UI configuration
objects at site scope are exported.
[-for_role=<role-name>] TC role specific to which ui config objects
are exported. If for_group and for_role
are not mentioned, UI configuration
objects at site scope are exported.
[-for_workspace=<workspace-name>]
TC workspace specific to which ui config objects
are exported. If for_workspace, for_group and for_role are not
mentioned, UI configuration objects
are exported with site scope. Multiple workspaces can
be specified separated by commas
[-client_scope_URI=<ClientScope URI>]
If specified, UI configuration objects
corresponding only to this client scope are exported
[-client=<client-name>] If specified, UI configuration objects
corresponding only to this client are exported.
-file=<file-path> Path of the export file.
Auflistung der möglichen Bereiche für Anpassungen:
name=„Advanced Search“
name=„All“
name=„All“
name=„Answered“
name=„awb0ContentTable.Awb0SavedBookmark“
name=„awb0ContentTable.ItemRevision“
name=„Commands With Conditions“
name=„Content Table Design Revision“
name=„Content Table Part Revision“
name=„Content“
name=„Error“
name=„Following“
name=„GlobalCommands“
name=„GlobalStableCommands“
name=„Inbox“
name=„InboxAllTasks“
name=„InboxMyTasks“
name=„InboxSurrogateTasks“
name=„My Favorites“
name=„My Project List“
name=„My Project“
name=„My Reports“
name=„My Saved“
name=„Navigate“
name=„News Feed“
name=„Not Answered“
name=„occurrenceManagementMarkup“
name=„PdfPane“
name=„Printouts“
name=„Recent“
name=„Recent“
name=„Report“
name=„Reports“
name=„Results“
name=„Results“
name=„Settings“
name=„Show Object“
name=„Show Pdf File“
name=„Show Tc Gateway“
name=„Team“
name=„Tracking“
name=„Um0ShowGroup“
name=„Um0ShowOrganization“
name=„Um0ShowRole“
name=„Um0ShowUser“
name=„Visualization“
name=„XrtObjectSet“
name=„XRTRelations“
17.1 Beispiel zusätzliche Attribute im Suchergebnis anzeigen
XML exportieren, Anpassen und wieder importieren
<Client abbreviation=„AWClient“ name=„AWClient“>
<ClientScope hostingClientName=“„ name=„Navigate“ uri=„Awp0ObjectNavigation“>
<ColumnConfig columnConfigId=„searchResultsColConfig“ sortBy=„1“ sortDirection=„Descending“>
<ColumnDef columnName=„object_name“ objectType=„WorkspaceObject“ propertyName=„object_name“ width=„300“/>
<ColumnDef columnName=„object_desc“ objectType=„WorkspaceObject“ propertyName=„object_desc“ width=„300“/>
<ColumnDef columnName=„release_status_list“ objectType=„WorkspaceObject“ propertyName=„release_status_list“ width=„250“/>
<ColumnDef columnName=„awp0Item_item_id“ objectType=„ItemRevision“ propertyName=„awp0Item_item_id“ width=„250“/>
<ColumnDef columnName=„item_revision_id“ objectType=„ItemRevision“ propertyName=„item_revision_id“ width=„250“/>
<ColumnDef columnName=„fnd0InProcess“ objectType=„WorkspaceObject“ propertyName=„fnd0InProcess“ width=„250“/>
<ColumnDef columnName=„ics_subclass_name“ objectType=„WorkspaceObject“ propertyName=„ics_subclass_name“ width=„250“/>
<ColumnDef columnName=„po_object_name“ objectType=„PublishedObject“ propertyName=„po_object_name“ width=„250“/>
<ColumnDef columnName=„po_group_id“ objectType=„PublishedObject“ propertyName=„po_group_id“ width=„250“/>
<ColumnDef columnName=„po_object_creation_date“ objectType=„PublishedObject“ propertyName=„po_object_creation_date“ width=„250“/>
<ColumnDef columnName=„po_object_type“ objectType=„PublishedObject“ propertyName=„po_object_type“ width=„250“/>
Zusätzliches Attribut
<ColumnDef columnName=“ av4_MATERIAL „ objectType=„Av4_MCADRevision“ propertyName=„av4_MATERIAL“ width=„250“/>
</ColumnConfig>
</ClientScope>
</Client>
Änderungen übernehmen
import_uiconfig -u=infodba -p=infodba -g=dba -file=c:\temp\ui.xml
USAGE: import_uiconfig [-u=<username>] { [-p=<password> | -pf=<password file>] } [-g=<groupname>] <args>
[-u=<user_id>] TC user ID. In most cases the TC user ID will
be infodba or another TC user ID with system
administrative privileges. If this argument is used
without a value, the operating system user name is used.
[-p=<password>] TC password associated with the -u=<user_id>.
[-pf=<password file>] Used in lieu of -p=<password> option for advanced security.
Specifies the file (with absolute path) that contains TC
administrator's password.
[-g=<group-name>] TC group associated with the -u=<user_id>. If this
argument is not given or used without a value, the
user's default group is assumed.
[-for_group=<group-name>]
TC group specific to which ui config objects
are imported. If for_group and for_role are not
mentioned, UI configuration objects
are imported with site scope.Multiple groups can
be specified separated by commas
[-for_role=<role-name>] TC role specific to which ui config objects
are imported. If for_group and for_role are not
mentioned, UI configuration objects
are imported with site scope. Multiple roles can
be specified separated by commas
[-for_workspace=<workspace-name>] TC workspace specific to which ui config objects
are imported. If for_workspace, for_group and for_role are not
mentioned, UI configuration objects
are imported with site scope. Multiple workspaces can
be specified separated by commas
[-action=<value>] As of now following two actions are supported
1. skip - This option will cause existing ColumnConfig
to be retained and will not be updated.
2. merge - This option will merge the new column config with existing
columnConfig.
If -action is not specified then by default it is considered as
override action
and it will retain the last imported column config.
-file=<file-path> Path of the import file.
Ergebnis:
18 Erstellen einer Struktur Baseline mit AWC
Anders als im RAC funktioniert der Baseline Prozess im AW etwas anders.
Funktion heute Im RAC: > Tools > Baseline…
Für den AW muss zwingend das AsyncService Dispatcher Modul aktiviert und konfiguriert sein.
· c:\plm\dispatcher\Module\conf\translator.xml
<!– Configuration of the asyncservice –>
<AsyncService provider=„SIEMENS“ service=„asyncservice“ isactive=„true“>
<TransExecutable name=„asyncservice.bat“ dir=“&MODULEBASE;/Translators/asyncservice„/>
· c:\plm\dispatcher\Module\Translators\asyncservice\asyncservice.bat
set TC_ROOT=C:\plm\tc12
set TC_DATA=C:\plm\tcshare\tc12\tcproddata
· Die Präferenz EPM_task_execution_mode kann auf FOREGROUND stehen bleiben.
19 Icon Status Av4_Obsolete (old!)
Neu: Kapitel 20
Help:
https://docs.plm.automation.siemens.com/tdoc/aw/4.1/aw_html_collection#uid:xid1476343
Als erstes muss ein Icon für den Staus erstellet werden.
Als Basis dient folgende Datei:
%TC_ROOT%\aws2\stage\src\image\indicatorReleased16.svg
Kopie erstellen und enstpechend anpassen
indicatorReleasedAv4_Obsolete16.svg
als nächstes muss der Status in AWC konfiguriert werden
folgende Datei editieren: neu: ein eigenes KIT erstellen
.NET
%TC_ROOT%\aws2\stage\repo\kit\tc-aw-framework\module.json
J2EE (oder ab 4.2…)
%TC_ROOT%\aws2\stage\components\activeworkspace\repo\kit\tc-aw-framework\module.json
(kopie eines bestehenden machen und anpassen)
Deployen…
20 Status Indicator for AW
Für jeden Status muss ein Icon definiert bzw. erstellt werden.
Mögliche Vorlagen unter:
\avaCentralRepo\avaBase\Tc12.x\trunk\Icons\AWC_Icons\indicatorReleased*16.svg
Die Benennungs-Syntax ist wie folgt: indicatorReleased[status real name]16.svg
Bei Bedarf eine Kopie erstellen und entsprechend anpassen.
Zum Beispiel: indicatorReleasedAv4_Prototype16.svg
Das Modul nach TC_ROOT kopieren und anpassen:
Source:
\init_Tc12_tcprod\00_Server_copy\Servername\c\plm\tc12\aws2\stage\src\av4kundeindicators\
Target:
%TC_ROOT%\aws2\stage\src\av4kundeindicators\
Jeder Status muss für den AW konfiguriert werden:
Die folgende Datei editieren:
%TC_ROOT%\aws2\stage\src\av4kundeindicators\module.json
è Kopie eines bestehenden Abschnittes machen und anpassen
„fx_release_status_list_Av4_Freigegeben“: {
„iconName“: „ReleasedAv4_Freigegeben“,
„tooltip“: {
„showPropDisplayName“: false,
„propNames“: [
„object_name“,
„date_released“
]
},
„prop“: {
„names“: [„release_status_list“],
„type“: {
„names“: [„ReleaseStatus“],
„prop“: {
„names“: [„object_name“],
„conditions“: {
„object_name“: {
„$eq“: „Av4_Freigegeben“
}
}
}
}
},
„modelTypes“: [
„WorkspaceObject“
]
},
èDeploy
21 Document Item Prefiew PDF
Zum Anzeigen von PDF muss folgende Präferenz erweitert werden:
<preference name=„AWC_defaultViewerConfig.VIEWERCONFIG“ type=„String“ array=„true“ disabled=„false“ protectionScope=„Site“ envEnabled=„false“>
<preference_description>Defines the default viewer configuration for Active Workspace.
The format of SEARCHORDER entry should be as follows: SEARCHORDER.<Business_Object_Type>=<GRM1>,<GRM2>,<GRM3>…
The format of Dataset-Viewer mappings should be as follows: <Dataset_Type>.<Viewer_Name>=<reference_Name></preference_description>
<context name=„Teamcenter“>
<value>SEARCHORDER.DocumentRevision=TC_Attaches,IMAN_reference,IMAN_specification</value>
22 Defining the revision rules list
By default, the list of available revision rules is obtained from Teamcenter. However, as an administrator, you may want to provide different revision rules for Active Workspace than are used in the rich client. For example, you may want to have Active Workspace default to Latest Released whereas you want the rich client to still default to Latest Working.
To set a different list of revision rules for Active Workspace, add revision rules to the AWC_Rev_Rule_List preference. Whenever a custom revision rule is created, you must add it to this preference for it to appear in the revision rules list. By default, the preference is empty, meaning that the revision rules list in Active Workspace defaults to the revision rules from the rich client.
To set the revision rule that is selected by default, add it to the AWC_Rev_Rule_Selected preference. The revision rule in this preference must match a revision rule in the AWC_Rev_Rule_List preference.
If the revision rule in the AWC_Rev_Rule_Selected preference is removed from the AWC_Rev_Rule_List preference, you must change the revision rule in the AWC_Rev_Rule_Selected preference to one in the AWC_Rev_Rule_List preference.
By default, the AWC_Rev_Rule_Selected preference is empty, meaning that the first revision rule in the AWC_Rev_Rule_List preference is the one that is selected by default in the user interface
23 Declarative Table Columns
23.1 Export / Import ui_config.xml
Export configuration
export_uiconfig -u=infodba -p=infodba -g=dba -for_group=Organization -file=c:\temp\ui_config.xml
export_uiconfig -u=infodba -p=infodba -g=dba -file=c:\temp\ui_orig_config.xml
Import configuration, e.g. for group, role or workspace
import_uiconfig -u= infodba -p=*** -g=dba -for_group=Organization -action=merge -file=c:\temp\ui_config.xml
Import configuration for group dba …
import_uiconfig -u= infodba -p=*** -g=dba -file=c:\temp\ui_config.xml
Delete configuration for group dba …
delete_uiconfig -u= infodba -p=*** -g=dba
24 Löschen in AWC
<preference name=„AWS_allowedTypesForDelete“ type=„String“ array=„true“ disabled=„false“ protectionScope=„Site“ envEnabled=„false“>
<preference_description>Defines the list of Business Object types for which the "Delete" command is visible.</preference_description>
<context name=„Teamcenter“>
<value>Awb0SavedBookmark</value>
<!–<value>ItemRevision</value>–>
<!–<value>Item</value>–>
<!–<value>Dataset</value>–>
<!–<value>Folder</value>–>
</context>
</preference>
25 Autoassign der Item-ID deaktivieren
Grundlage
Für jeden Itemtyp muss ein Create-Stylesheet erstellt werde.
Darin muss folgende Zeile ergänzt werden:
Wird
isAutoAssign=„false“
26 Xxx
Webseiten-Werkzeuge
Engineering IT Systeme Software-Portfolio
1. Engineering IT Systeme Software-Portfolio
Solid Edge
1. Solid Edge 2023 Upgrade
Admin Doku
1. Logging tc_profilevars.bat
2. AWC Admin Dokumentation
3. Abgleich der Daten von zwei Datenbanken
4. Suchen über Klassifizierung im AWC
5. Überprüfung von exportierten Workflows auf doppelte Einträge
6. HIMA Syslogs
7. Tc 12 Security Services - Installation / Customization
8. Preferences Manager
9. Durchgeführte Deploys Auflistung
10. Dispatcher Error Mailbenachrichtigung konfigurieren
11. Abgestürzten Windows-Dienst mit taskkill beenden
12. Teamcenter Backup and Restore Strategie
13. Anleitung zum Resetten des Dispatchers auf Multiserverumgebungen
14. Ändern der DPI-Skalierungsstufe für Display Registrierungseinstellung
15. Windows Programme außerhalb des Bildschirms zurückholen
Teamcenter GoLive Training
1. Teamcenter Training
2. Teamcenter Training Übungen
EPLAN - integrate2
1. Einleitung
2. Funktionsbeschreibung
3. Die Integration bedienen
4. Troubleshooting